Just in case you are not quite sure whether you would be able to do applique lettering, I want to ensure you that it is very easy. Here is a small tutorial on the “How to of Applique Lettering”. Soon, you will find a free alternate “A” posted for my Country Garden Alphabet to allow you to practice what I am going to show you in this tutorial. I think once you do this, you will be “hooked”. There are so many advantages to doing applique lettering or applique in general. What are some of those advantages? (keep reading….)
1. Your stitch count is much lower than it would be if you had to do 5″ lettering. That means less thread is being used and less time spent sewing out the design.
2. The design is so much more pliable – not as hard as a board as some filled designs can be.
3. You can use up all those leftover scraps of fabric you have accumulated and hope to be using someday – that is if you are anything like me! 🙂
4. It is easy to create matches to other fabrics used in a piece of clothing, curtains, etc.
Have I convinced you yet to give these lettes a try? Well, if not, let me show you some photos of how it’s done:
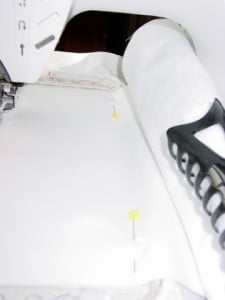
1. Hoop your stabilizer (I use medium weight tear away most of the time) and attach your fabric that you want to put the applique on to the stabilizer. I usually use Gunold’s KK100 (no CFC) ahesive spray. I spray the back of the fabric and place it on top of the stabilizer, securing it with 3-4 straight pins along the edge of the inside of the hoop.

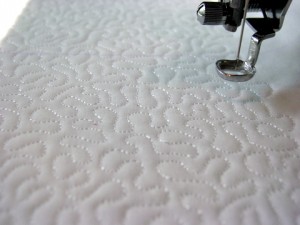
2. Stitch your stippling stitch (if you wish to use it). I used a stippling stitch from Elsa’s Designs that she kindly has made available here: http://www.elsa.20megsfree.com/freebies.html
(I downloaded the Giant stipple design which is a split design for the left side and then the right side of a design – those left and right sides are both for the 5×7 hoops.)
Elsa is a South African digitizer who does superb flower designs. Please visit her for sale site when you get a chance. Her designs are a dream to stitch out. (I have no affiliation with Elsa other than being an occasional customer of hers.)
http://www.elsasdesigns.com/page2.html
Okay, back to the tutorial.
After you stitch out your stippling (if used), it should look like this:
3. Now it’s time to get your letter – get it into your machine and onto your screen and start stitching color number 1. ( There is a triple sequence to appliqueing lettering. You first laydown the outline of where you need to place your fabric, you then tack down that fabric, trim the fabric after stitchout, and then apply the applique edge stitch.)
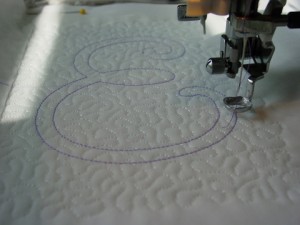
4. Now get your piece of fabric that will cover this outline and make sure it’s big enough. I like to starch and iron it, then apply adhesive spray to the back of the fabric and place it over the outline. Sometimes, I secure the applique fabric with a couple of straight pins, just to make sure it’s not moving when the machine starts stitching. Now stitch the tack down color = number 2.
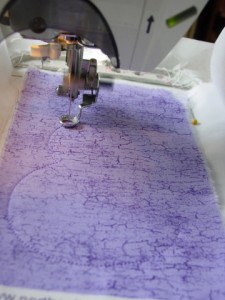
4. When the machine stops after the tack down, remove the hoop from the machine, but do NOT unhoop anything. Take small, curved scissors and trim away the fabric close to stitching line.
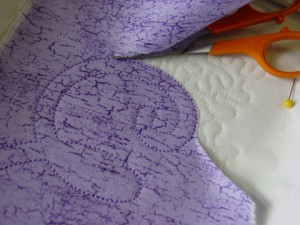
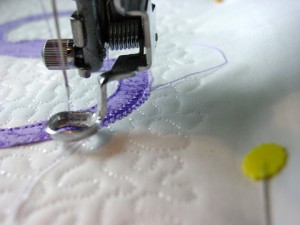
5. After trimming, place the hoop back onto the machine. And allow the machine to stitch the next color which is the applique stitch and follow the text instructions for any add on designs.
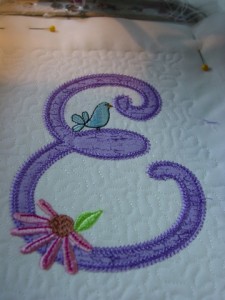
Now, wasn’t that easy?
A word of caution: When you stitch out my applique Country Garden lettering, be sure you follow the text carefully. Sometimes, in order to hide a flower stem or the edge of a birdhouse underneath the applique edge, the stitching sequence of those three applique steps may have been slightly altered. If you follow my typed instructions, you should have no problems with it whatsoever.
Here is the free “A”. I hope you will find this helpful.[download id=”123″]


Great tut! Thank you very much
Many Thangs!
This tutorian is so easy,i wanna make this.Greetings from Finlamd
Thank you, have not attempted applique before but your tutorial makes it look really easy, will let you know how it turns out.