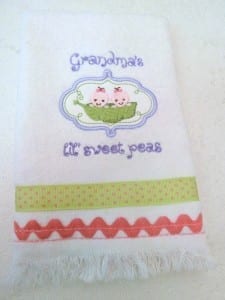
Just quickly wanted to share with you something I have been working on: A set of labels for twins. These are sooo cute. There are 10 designs in this set and I made them with burp pads, bibs, and blankets in mind. What do you think? I have also made a tutorial on how to make burp pads out of little guest towels. These are fun to make and really come together quickly, especially if you use my designs. You knew I was going to say that, didn’t you?!! 🙂 I am posting the tutorial right here on this blog. Okay, here it is:
These burp pads are so fun and quick to make.
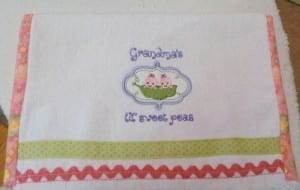
You use a small guest towel (I used a 6 pack from WalMart), apply a colored fabric backing, place your favorite burp design on it and add trim to your liking. The terry cloth from the towel absorbs spills and burps very nicely and is soft to baby’s skin. The fringes at the top and bottom add a playful touch to the burp pad.
You Need:
1 guest towel (mine was 10.5″x16.0″ — if yours is a different size, be sure to adjust the backing
fabric size.)
1 piece of fabric 12×16″ (for backing)
Trims, if desired
Instructions:
1. Take your towel, mark the center, and place your choice of baby design on one side of the towel, about
4-5″ up from the bottom edge (depending on how much trim you want to add under the design).
2. After you placed your design, add trim of your choice under design.
3. Take your backing fabric, press a top and bottom edge seam of ¾”.
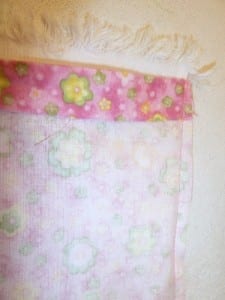
4. Place the right side of the backing over the right side of the towel, and sew ¼” seam along the long edge.
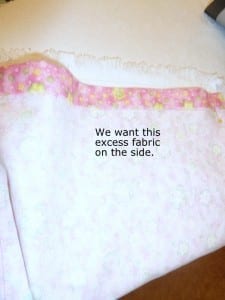
5. When you have sewn one side, do the same to the other. You will notice that the backing appears wider
than the towel. That’s what we want.
6. Turn everything inside out.
7. Even out the backing fabric so that you will have an equal amount of fabric “overhang” on both sides of the
burp pad, creating a little decorative edge.
8. Stitch in the ditch along the burp pad long edges.
9. Stitch the backing to the burp pad front by topstitching along the top and bottom edges, close to the start of the fringe. You could also just use Steam a Seam 2 and iron the backing in place.
Iron it — and there you are. Isn’t this cute? And so very functional.


Our pastor’s wife is expecting twin boys this summer. They’d been praying about whether or not to have a 4th child and while “thinking and praying” learned that they were pregnant. A few weeks later, they learned that they weren’t “just pregnant with their 4th” but with numbers 4&5! They are a sweet, precious, young family… (ages 30 and 33), who will have 5 children “under 5” this summer. Our pastor’s wife has a sister who is also pregnant, but learned during her pregnancy that she has breast cancer, so the family has been through a lot this past year. I’ve just discovered your web site for the first time, while searching for burp cloth ideas. I’m looking forward to using some of your designs for baby gifts and to bless our pastor’s family…as well as our own children. We have 3 adult children. Three of them are married with little ones. We have 3 little granddaughters, a newborn grandson, and another grandson due in April. Two of our sons are serving in the military right now… in Kuwait and Afghanistan. I’m still working at the hospital as a nurse. You have a lot of designs I’m eager to try on my new embroidery machine. I’m so excited to find you! God bless you and your family. Jeanie